Karen Colburn
Tuesday, December 30, 2014
November 2014 Paper Pumpkin Projects
Just a few of the projects that I made using the November Paper Pumpkin Kit.
Happy Stampin'
Karen Colburn
Karen Colburn
Saturday, December 27, 2014
Paper Pumpkin Projects
A few more cards made with the October Paper Pumpkin kit. I love these kits because there is so much you can do with them and they really have so much product.
Paper Pumpkin: October 2014 kit components
Colors: Real Red, Olive Olive, Pacific Point, Kraft, Pear Pizazz,Tangerine Tango, Whisper White
Tools: Starburst Framelit, Circle Framelits, Snowflake Card Thinlets
Punches: Itty Bitty Accents, Confetti Stars
Embossing: Lucky Stars Embossing Folder, Northern Flurry Embossing Folder
Miscellaneous: Buttons, Pearls, Rhinestones
Check out the Year End Closeouts. The designer paper Under the Tree and the Red Grosgrain Ribbon used on some of these cards is on sale right now while supplies last.
Happy Stampin,
Karen Colburn
Wednesday, December 24, 2014
Clearance Rack Update
New items from the Holiday Catalog and Supplement have been added to the Clearance Rack. Get these new items before they are gone.
Merry Christmas,
Karen Colburn
Merry Christmas,
Karen Colburn
Paper Pumpkin November 2014
If you are interested in subscribing, check out www.mypaperpumpkin.com to sign up. Remember to choose me as your demonstrator.
Happy Stampin',
Karen Colburn
Merry Christmas
Between having the flu, getting a new computer and software, and work, I have been away from my blog for awhile. I am experimenting with the software and computer, so hopefully this goes well.
All these card were made using the new stamp set in the Holiday supplement Many Merry Stars. Of course this set coordinates with the Star Framelits.
Enjoy.
Merry Christmas and Happy New Year,
Karen Colburn
All these card were made using the new stamp set in the Holiday supplement Many Merry Stars. Of course this set coordinates with the Star Framelits.
Enjoy.
Merry Christmas and Happy New Year,
Karen Colburn
Friday, October 31, 2014
Color Me Autumn
This is one of my favorite papers in the new Holiday Catalog. I used Color Me Autumn Designer Series Paper . The dots on the card are hot glue that was melted onto the Stampin' Up Silicon Sheet that I brayered with Gold Encore Ink.
The stamp set is For All Things.
To make the dots:
The stamp set is For All Things.
To make the dots:
- Use a brayer and ink your silicon sheet. Make sure you have a good layer of ink.
- Use a hot melt clear glue stick and drop dots on your silicon sheet on the ink. (Cool temperature glue sticks will not work.)
- Let your dots cool, peel them off and adhere them to your project using liquid glue or a glue dot.
- This will work with any Stampin' Up ink.
Happy Stampin'
Karen Colburn
Wednesday, October 29, 2014
For All Things - - - 2
This is another card using the set "For All Things". Love the colors of fall and this time of year, my favorite.
Happy Stampin'
Karen Colburn
Tuesday, October 28, 2014
Chalk Talk and Fall
I love warm colors and fall lends itself to the colors I like. This card was made using the colors Early Espresso and Cajun Craze. I also used washi tap, twine, and the Chalk Talk set, both the dies and stamp.
Happy Stampin'
Karen Colburn
Happy Stampin'
Karen Colburn
Monday, October 27, 2014
Welcome Kit, Paper Pumpkin
I have been posting some of the variations made from the Paper Pumpkin kits. These cards are from the Welcome Kit.
Sunday, October 26, 2014
Wish Big, Paper Pumpkin Kit
Here are some of the projects that I made with the Wish Big Kit.
Saturday, October 25, 2014
Merry & Bright
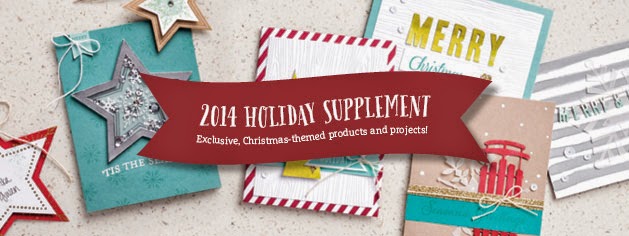
Stampin' Up has just released a new2014 Holiday Supplement. There are a number of new holiday stamp sets, accessories, and embellishments. My favorite item is the new Many Merry Stars Creative Kit.
This new kit includes enough product to make your own 3D stars this season in a variety of sizes and patterns. Use them for ornaments, home décor, place cards, and more.
There are enough supplies to create a 15" | 38 cm star and 25 smaller stars, 5 each of 5 sizes:
• Printed, die-cut star pieces
• Printed, self-adhesive die-cut side pieces
• Wooden snowflakes
• 7 sheets die-cut tags, banners, greetings, and accents
Check it out on my Stampin' Up® Website.
Happy Stampin'
Karen Colburn
Friday, October 24, 2014
Merry
Christmas and Thanksgiving are in the air for me. This time of year just makes me want to stamp. With the help of all the great stamps and accessories in the Holiday catalog. That is not hard to do.
Items Used in this card:
Frosted Sequins, 135835
Filigree Embossing Folder, 135818
Trim a Tree Paper Pack, 135824
Gold Satin Ribbon, 134547
Garden Green Cardstock, 102584
Whisper White Cardstock, 100730
Window Sheet, 114323
Pearls, 119247
Label Card Thinlits Die (banner die), 133479
Happy Stampin'
Karen Colburn
For All Things
Love these colors and this time of year. Fall is my favorite. This stamp set and paper capture the beautiful leaves.
Enjoy.
Enjoy.
Happy Stampin'
Karen Colburn
Wednesday, October 22, 2014
All Is Calm
I have been playing with the stamp set White Christmas. I love the set. I used the All is Calm Designer Paper with it. Did some masking and water coloring.
Happy Stampin'
Karen Colburn
Happy Stampin'
Karen Colburn
Tuesday, October 21, 2014
Sunday, October 19, 2014
Saturday, October 18, 2014
Blush Blossom Marker - - No Flesh Tone
I have an old Blush Blossom marker and that is what I use when I water color stamped images and need a light flesh tone. This marker is no longer available, so what do you do? I experimented with several colors, but this was my best combination for a light flesh tone. I used Pink Pirquette as the base and added Crumb Cake and Crushed Curry. Pull in more of the pink than the other two colors. Blend until you get the right mix.
If you are going for a darker flesh tone, start with the Pink Pirquette and pull in a little red and a darker brown as well as the crumb cake. Just a touch of Early Espresso and Cajun Craze should get you the deeper color that you need. Use the same yellow, Crushed Curry for the yellow undertones. Just keep blending until you get the right mix.
Hope this helps with the flesh color water coloring dilemma.
Happy Stampin'
Karen Colburn
Subscribe to:
Comments (Atom)


